Welcome to the comprehensive guide for the Nikon D7100, designed to unlock its full potential․ This manual provides detailed insights into the camera’s features, settings, and best practices․ Whether you’re a professional or enthusiast, this resource ensures safe and effective use of your Nikon D7100․
1․1 Purpose and Structure of the Manual
The Nikon D7100 manual is designed to provide users with a comprehensive understanding of the camera’s features, functions, and optimal usage․ Its primary purpose is to guide photographers, from beginners to advanced enthusiasts, in unlocking the full potential of their Nikon D7100․ The manual is structured logically to ensure easy navigation and accessibility of information․
- Key Features and Specifications: Details the camera’s technical aspects, such as sensor capabilities, ISO range, and shooting modes․
- Safety Guidelines: Emphasizes proper handling, storage, and battery care to ensure longevity and safety․
- Camera Layout and Controls: Explains the placement and functionality of buttons, dials, and lenses․
- Shooting Modes and Settings: Provides in-depth explanations of various modes and customization options․
Each section is crafted to build upon the previous one, ensuring a progressive learning experience․ The manual also includes safety tips, best practices, and troubleshooting advice to address common issues․ By following this guide, users can master their Nikon D7100 and achieve professional-grade results in their photography endeavors․
1․2 Target Audience
The Nikon D7100 manual is tailored for a diverse range of users, ensuring that both novice and advanced photographers can benefit from its detailed guidance․ Primary users include:
- Professional Photographers: Those seeking advanced features and customization options to achieve precise control over their work․
- Hobbyists and Enthusiasts: Individuals passionate about photography who want to explore the camera’s capabilities and improve their skills․
- New Camera Owners: First-time users of the Nikon D7100 who need clear instructions to understand and utilize the camera’s functions effectively․
- Educational Institutions: Students and educators who rely on the manual for teaching and learning photography techniques․
The manual is designed to cater to varying skill levels, providing straightforward explanations for beginners while offering in-depth technical details for experienced users․ Its comprehensive structure ensures that all users can navigate the camera’s features with confidence․ By following the guidelines and tips outlined in the manual, photographers can maximize the potential of their Nikon D7100 and achieve exceptional results in their imaging endeavors․
1․3 Navigating the Manual Effectively
To make the most of the Nikon D7100 manual, it’s essential to navigate its content efficiently․ The manual is structured logically, with clear headings and subheadings that guide users through the camera’s features and functions․ Start by reviewing the table of contents to identify sections relevant to your needs․
- Use the Index: The manual includes an index that allows quick access to specific topics, such as settings, shooting modes, or troubleshooting․
- Understand Visual Aids: Diagrams, charts, and images are included to help users visualize camera components and settings, making complex information easier to digest․
- Follow Step-by-Step Guides: Many sections provide sequential instructions for tasks like setting up the camera, using advanced modes, or customizing settings․ Follow these steps carefully to avoid confusion․
- Refer to Safety Guidelines: Before experimenting with new features, review the safety precautions to ensure proper handling and maintenance of the camera․
- Bookmark Frequently Used Pages: If you find yourself referencing certain sections often, consider bookmarking them for easy access․
By familiarizing yourself with the manual’s organization and utilizing its visual and textual resources, you can master the Nikon D7100’s capabilities․ Remember, practice is key—apply the knowledge gained from the manual to real-world photography scenarios to enhance your skills․

Key Features and Specifications
The Nikon D7100 boasts a 24․1-megapixel APS-C CMOS sensor, powered by the EXPEED 3 processor, delivering sharp images and fast performance․ It features a 51-point autofocus system, 6 fps continuous shooting, and an ISO range of 100-6400 (expandable to 25600)․ It supports full HD 1080p video recording and dual SD card slots for enhanced storage flexibility․
2․1 Sensor and Processor Overview

The Nikon D7100 is equipped with a 24․1-megapixel APS-C CMOS sensor, designed to capture high-resolution images with exceptional detail and clarity․ This sensor is paired with Nikon’s EXPEED 3 image-processing engine, which enhances color accuracy, reduces noise, and improves overall performance․ The combination of the sensor and processor ensures faster data processing, enabling features like continuous shooting and advanced autofocus functionality․ The sensor’s design without an optical low-pass filter (OLPF) allows for sharper images, making it ideal for photographers who prioritize detail and image quality․ Additionally, the EXPEED 3 processor supports the camera’s ability to shoot in various formats, including RAW and JPEG, and enables efficient noise reduction at higher ISO settings․ This powerful sensor and processor duo makes the D7100 capable of producing professional-grade images in a wide range of lighting conditions․
The sensor’s APS-C size strikes a balance between portability and image quality, while the EXPEED 3 processor ensures that the camera operates smoothly, even during demanding tasks like video recording or rapid burst shooting․ Together, they form the core of the D7100’s imaging system, delivering outstanding performance for both still photography and multimedia applications․
2․2 ISO Range and Sensitivity
The Nikon D7100 features an impressive ISO range of 100 to 6400 in its standard settings, with the ability to expand this range to an equivalent of ISO 25600․ This wide sensitivity range makes the camera highly versatile, allowing photographers to capture sharp and detailed images in a variety of lighting conditions, from bright daylight to low-light environments․ The camera’s advanced noise reduction capabilities, supported by the EXPEED 3 processor, ensure that even at higher ISO settings, images remain clean and free from excessive grain or noise․
The ISO range is particularly useful for low-light photography, where it enables the use of faster shutter speeds or smaller apertures without compromising image quality․ Photographers can confidently shoot in challenging lighting conditions, such as indoor events, nighttime scenes, or shaded areas, knowing the D7100 can adapt effectively․ Additionally, the ability to adjust ISO sensitivity in 1/3 EV increments provides precise control over exposure, allowing for fine-tuned results․ This feature is especially beneficial for professionals and enthusiasts who require consistent image quality across diverse shooting scenarios․
By maintaining a balance between sensitivity and noise reduction, the D7100 delivers outstanding low-light performance, making it a reliable choice for photographers who need flexibility and reliability in their imaging workflow․
2․3 Continuous Shooting Capabilities
The Nikon D7100 excels in capturing fast-paced action with its robust continuous shooting capabilities․ The camera can shoot at a rapid rate of up to 6 frames per second (fps) in its standard continuous shooting mode, making it ideal for sports, wildlife, and action photography․ This feature allows photographers to freeze fleeting moments and capture sequences with precision and clarity․
In continuous high-speed mode, the D7100 can capture up to 50 consecutive JPEG images or 10 RAW files before the buffer fills, ensuring uninterrupted shooting for critical moments․ The camera’s advanced buffer management, combined with the EXPEED 3 image processor, enables efficient data processing and writing to memory cards, minimizing downtime between bursts․
The continuous shooting function also works seamlessly with the camera’s autofocus system, allowing for subject tracking during bursts․ This ensures sharp focus on moving subjects, even at the maximum frame rate․ Additionally, the D7100 supports interval shooting and quiet continuous modes, offering flexibility for different shooting scenarios․
Whether you’re capturing dynamic action or documenting events, the D7100’s continuous shooting capabilities provide the speed and reliability needed to deliver professional-grade results in demanding situations․

Safety Guidelines and Precautions
Always handle the Nikon D7100 with care to avoid damage․ Avoid exposing the camera to water, extreme temperatures, or direct sunlight for prolonged periods․ Use a dry cloth for cleaning and ensure the camera is turned off before cleaning․ Never apply excessive force to buttons or dials․ Store the camera in a protective case when not in use to prevent scratches or damage․ Follow proper battery charging and storage guidelines to prevent overheating or leakage․ Regularly update firmware to maintain optimal performance and security․ Avoid using damaged memory cards or third-party accessories that may harm the camera․ Always use genuine Nikon parts and accessories for compatibility and safety․ By adhering to these guidelines, you can ensure the longevity and reliability of your Nikon D7100․
3․1 General Safety Tips
When using the Nikon D7100, always prioritize safety to protect both yourself and your equipment․ Begin by reading the manual thoroughly to understand proper operation and avoid accidental damage․ Keep the camera away from children and pets to prevent unintended harm or damage․ Ensure the camera is turned off before cleaning or storing it․ Avoid exposing the device to extreme temperatures, such as leaving it in a hot car or using it in freezing conditions without proper protection․ Use a high-quality protective case or bag to safeguard the camera during transport․ Never touch electrical components, such as the battery terminals or memory card slots, with wet hands․ Regularly inspect the camera for signs of wear, such as loose screws or frayed cables, and address these issues promptly․ When shooting in hazardous environments, such as near water or in dusty conditions, take extra precautions to protect the camera from moisture or debris․ Finally, always use a neck strap or hand grip to prevent accidental drops, which can cause significant damage to the camera and its components․ By following these general safety tips, you can ensure a safe and enjoyable photography experience with your Nikon D7100․
3․2 Handling and Storage Precautions
Proper handling and storage of your Nikon D7100 are essential to maintain its performance and longevity․ Always handle the camera with clean, dry hands to prevent oils and dirt from damaging the exterior or internal components․ Avoid exposing the camera to extreme temperatures, such as those above 40°C (104°F) or below -10°C (14°F), as this can affect its functionality and battery life․ Use a high-quality camera bag or case to protect the device during transport, ensuring it is cushioned and secure․ When storing the camera for extended periods, place it in a cool, dry environment with low humidity to prevent mold or rust․ Avoid stacking heavy objects on top of the camera or lens, as this can cause physical damage․ For lenses, always use a lens cap when not in use to protect against dust, scratches, and fingerprints․ Store lenses in a separate compartment or pouch to avoid accidental impact․ Additionally, keep the camera and accessories away from direct sunlight, as prolonged exposure can cause discoloration or warping of plastic components․ Regularly clean the camera body and lenses using a soft, dry cloth to remove dust and smudges․ By following these handling and storage precautions, you can ensure your Nikon D7100 remains in optimal condition for years of reliable use․
3․3 Battery Safety and Best Practices
Proper care and handling of the Nikon D7100’s battery are crucial for ensuring optimal performance, safety, and longevity․ Always use the EN-EL15 lithium-ion battery provided by Nikon or certified third-party alternatives to avoid compatibility issues or potential damage․ Charge the battery using the supplied MH-25a charger, and avoid overcharging, as this can reduce the battery’s lifespan․ Never charge the battery near open flames or in high-temperature environments, as this may cause it to overheat․ When storing the battery for extended periods, keep it in a cool, dry place with a charge level between 40% and 80% to maintain its health․ Avoid exposing the battery to extreme temperatures, such as those below 0°C (32°F) or above 40°C (104°F), as this can affect its performance and capacity․ Clean the battery terminals with a soft, dry cloth to ensure proper connections․ If the battery is not functioning correctly, such as showing signs of swelling or leakage, discontinue use immediately and dispose of it according to local regulations․ Finally, avoid physical stress on the battery, such as bending or crushing, as this can lead to internal damage․ By following these best practices, you can extend the life of your Nikon D7100’s battery and ensure reliable performance during photography sessions․
Understanding the Camera’s Layout and Controls
The Nikon D7100 features an intuitive design with strategically placed controls for easy access․ The top panel includes the mode dial, ISO button, and shutter release, while the back panel houses the LCD screen, navigation buttons, and menu controls․ The lens mount area is designed for secure attachment and quick lens changes, ensuring smooth operation during shooting sessions․ Familiarizing yourself with these components is essential for efficient and creative photography․
4․1 Top Panel Controls
The top panel of the Nikon D7100 is designed for quick access to essential camera functions․ On the right side, you’ll find the mode dial, which allows you to switch between various shooting modes such as Manual (M), Aperture Priority (A), Shutter Priority (S), and Auto modes․ Next to the mode dial is the shutter release button, used to capture images․ The ISO button is located just behind the shutter release, enabling easy adjustment of sensitivity settings․ On the left side of the top panel, the metering mode button lets you cycle through different metering options, such as Matrix, Center-weighted, and Spot metering․ Additionally, the top panel features a hot shoe mount for attaching external flash units, enhancing your lighting capabilities․ Each control is strategically positioned to minimize hand movement, ensuring a smooth and intuitive shooting experience․ Understanding these controls is vital for maximizing the camera’s potential and improving your photography workflow․
4․2 Back Panel and Button Layout

The back panel of the Nikon D7100 is equipped with an array of buttons and controls designed to streamline your photography workflow․ The centerpiece is the 3․2-inch LCD screen, which provides a clear and vibrant display for previewing images, reviewing settings, and accessing the menu system․ To the left of the LCD, you’ll find the viewfinder, equipped with a diopter adjustment control for optimizing clarity based on your eyesight․
Below the LCD, the multi-selector and OK button allow for intuitive menu navigation and selection of focus points․ The playback button enables quick access to your captured images, while the delete button simplifies the process of removing unwanted photos․ The “i” button provides a shortcut to a customizable menu of frequently used settings, saving time during shoots․
Additionally, the back panel features zoom in and zoom out buttons, which are invaluable for examining image details or previewing compositions․ The live view switch and movie record button are strategically placed for easy access when capturing video or using live view mode․ Each button is thoughtfully positioned to ensure ergonomic operation, making the D7100 both user-friendly and efficient for photographers of all skill levels․
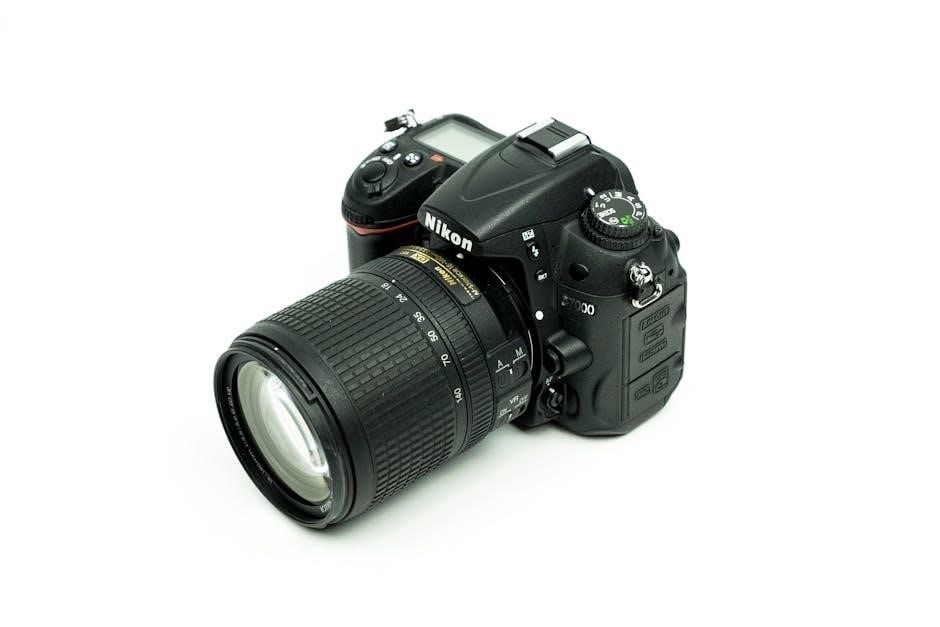
4․3 Lens Mount and Lens Controls

The Nikon D7100 features a robust F-mount lens system, designed for compatibility with a wide range of Nikon lenses, including DX and FX formats․ The lens mount is constructed from durable metal, ensuring long-lasting performance and resistance to wear and tear․ To attach a lens, align the white dot on the lens with the corresponding dot on the camera’s mount, then rotate the lens clockwise until it clicks into place․ To remove the lens, press and hold the lens release button while turning the lens counterclockwise․
The lens controls are intuitive and strategically positioned for easy access․ The zoom ring allows for smooth adjustment of the focal length, while the focus ring enables precise manual focusing․ Many Nikon lenses also feature a focus mode switch, which lets you toggle between autofocus (AF) and manual focus (MF) modes․ For lenses equipped with Vibration Reduction (VR), a dedicated switch on the side of the lens activates image stabilization, reducing camera shake and blur․
Understanding the lens mount and controls is essential for maximizing the D7100’s capabilities․ Proper handling ensures optimal performance and extends the lifespan of both the camera and lenses․ Always handle lenses with care, avoiding direct contact with the glass elements to prevent smudging or damage․

Shooting Modes and Settings
The Nikon D7100 offers a variety of shooting modes to suit different photography needs․ Modes include Auto, P (Programmed Auto), M (Manual), A/Av (Aperture Priority), and S/Tv (Shutter Priority)․ These modes provide flexibility, allowing photographers to control exposure settings while capturing high-quality images․ Custom settings can be personalized for enhanced creativity and convenience․
5․1 Manual Mode (M)
In Manual Mode (M), photographers gain full control over both aperture and shutter speed, allowing for precise adjustments to achieve the desired exposure․ This mode is ideal for experienced users who want to experiment with creative techniques or shoot in challenging lighting conditions․ The Nikon D7100’s Manual Mode enables users to set aperture using the front command dial and shutter speed via the rear command dial․ Additionally, ISO sensitivity can be adjusted manually or set to ISO 25600 for extreme low-light situations․
The camera’s built-in light meter provides a reference to ensure proper exposure, and users can fine-tune settings using exposure compensation․ For added control, the D7100 also features focus modes, including Single AF (AF-S), Continuous AF (AF-C), and Manual Focus (MF)․ The LCD screen on the back panel allows for quick adjustments and real-time preview of settings․ Manual Mode is particularly useful for genres like landscape, portrait, and low-light photography, where precise control over exposure parameters is essential․ By mastering Manual Mode, photographers can unlock the full potential of the D7100 and capture images that reflect their artistic vision․
For optimal results, it’s recommended to use the Depth of Field Preview button to check the effect of aperture on the scene․ Experimenting with different combinations of aperture, shutter speed, and ISO will help photographers refine their skills and achieve professional-grade results․ This mode truly offers the flexibility and creativity that advanced photographers demand․
5․2 Aperture Priority Mode (A/Av)
Aperture Priority Mode (A/Av) on the Nikon D7100 allows photographers to set the desired aperture while the camera automatically adjusts the shutter speed to achieve the correct exposure․ This mode is ideal for controlling depth of field, making it a favorite for portrait and landscape photography․ By adjusting the aperture using the front command dial, users can isolate subjects with a shallow depth of field or ensure sharpness across the entire frame with a narrow aperture․
The camera calculates the appropriate shutter speed based on the selected aperture and ISO sensitivity․ Exposure compensation is also available, enabling fine-tuning of the exposure to suit the scene․ The D7100’s advanced metering system ensures accurate results, even in challenging lighting conditions․ Aperture Priority Mode is particularly useful when the depth of field is a critical factor, such as when shooting close-ups or group portraits․
For added flexibility, the Auto ISO feature can be enabled, allowing the camera to adjust sensitivity dynamically within a user-defined range․ This mode strikes a balance between creative control and automation, making it accessible to both intermediate and advanced photographers․ By mastering Aperture Priority Mode, users can enhance their ability to capture images with precise depth of field control and professional-quality results․
Experimenting with different aperture values and observing their effects on the depth of field is highly recommended to fully utilize this mode’s capabilities․ This approach ensures that photographers can achieve their artistic vision while relying on the camera to handle the technical aspects of exposure․
5․3 Shutter Priority Mode (S/Tv)
Shutter Priority Mode (S/Tv) on the Nikon D7100 allows photographers to set a specific shutter speed, with the camera automatically adjusting the aperture to achieve the correct exposure․ This mode is particularly useful for capturing motion, making it ideal for sports, wildlife, and action photography․ By controlling the shutter speed, users can either freeze fast-moving subjects or create artistic motion blur, depending on their creative intent․
To adjust the shutter speed, photographers can use the rear command dial, with speeds ranging from 1/8000th of a second to 30 seconds․ Exposure compensation is also available, enabling fine-tuning of the exposure to suit the scene․ The D7100’s advanced metering system ensures accurate results, even in dynamic lighting conditions․ Shutter Priority Mode is especially beneficial when the goal is to emphasize motion or freeze action, such as capturing sharp images of moving subjects or creating silky water effects in landscapes․
When using this mode, the camera will automatically select the aperture based on the chosen shutter speed and ISO sensitivity․ For added convenience, the Auto ISO feature can be enabled, allowing the camera to adjust sensitivity dynamically within a user-defined range․ This mode provides a balance between creative control and automation, making it accessible to photographers of all skill levels․ By mastering Shutter Priority Mode, users can effectively capture dynamic images with precise control over motion and blur․
Experimenting with different shutter speeds and observing their effects on motion is highly recommended to fully explore the capabilities of this mode․ This hands-on approach helps photographers achieve their desired results while leveraging the camera’s advanced features․